How its made
Throwing
All my handmade pottery starts off with wet clay, which I either purchase from a pottery supply shop , or recycle from the scraps of other work. The clay is usually a great consistency out of the bag, but there can be variations in the moisture at the top that differs from the bottom, which can make throwing the clay more difficult. So, I usually start with a process called wedging, which is similar to kneading bread, with the aim of making the whole piece of clay consistent.
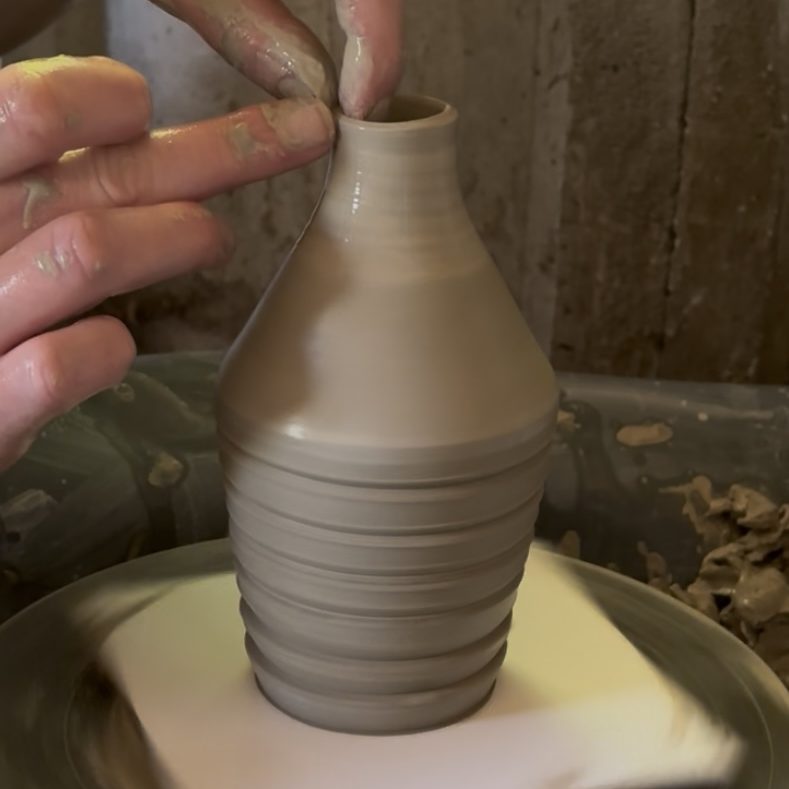
Once the clay is prepared, I can begin my favourite part; throwing. First, the clay is centred, which brings it all into an evenly spinning disc in the middle of the wheel. Then I make the hole in the centre, and pull up the walls, by squeezing the clay between my knuckles as the wheel spins round, which thins the clay and moves it into a taller shape. Finally, the piece is shaped by adding curves, widening and narrowing sections.
Drying and trimming
The thrown shape is allowed to dry over the course of hours, but often days, depending on the humidity and temperature, and flipped to ensure even drying. Of all the processes involved in creating a final piece of pottery, managing the drying of the pots is, for me at least, the most difficult part and can go wrong so easily. Especially if you're not in the studio all the time.
Once it is leather hard, which means that it is dry enough that the walls don't move when pressure is applied, the next stage can begin. This part requires the shape to be refined and the weight to be evened out, by a process called trimming. The aim is to make all the walls and base the same thickness. Again, this is a really tricky part, that requires lots of practice to get right. First it needs to be centred on the wheel again, I do this by tap centring, but there are other ways to do this for beginners. Too much trimming and a hole can easily be made in the base of your piece, making it unusable. Too little trimmed away and the pot is heavy, and could cause cracks as the thick piece of clay struggles to dry out evenly.
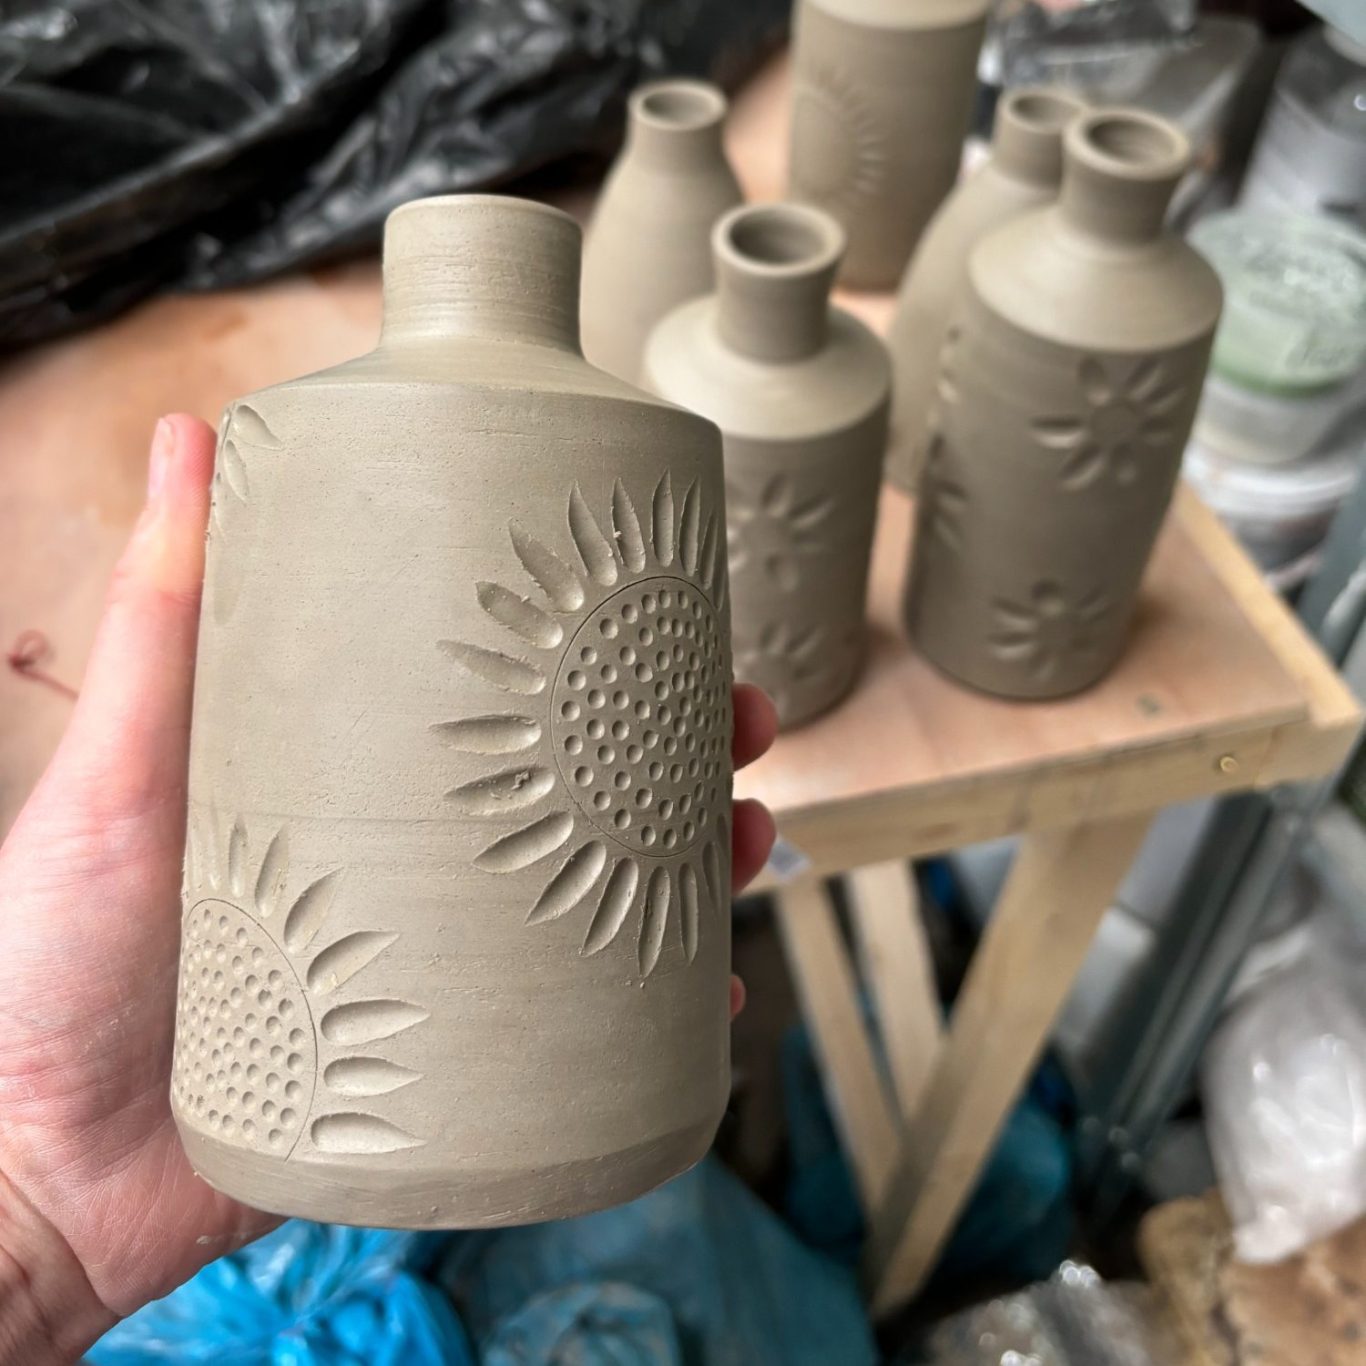
Some surface decoration can be added at this stage, such as carving to create patterns or texture. Liquid clay can also be added at this stage, known as slip. Its added to make raised patterns when thick by slip trailing, or thin coloured slip applied all over can be carved back in places to create images, which is known as sgraffito.
Bisque Firing
Once the piece has been trimmed and any surface decoration applied, it is again allowed to dry until all the moisture is removed. This is done slowly, because if the top of the clay dries and shrinks more quickly than the bottom, cracks can appear. Once it is fully dried, it is known as bone dry and is at its most fragile. Up until this point, the clay can be recycled if anything goes wrong, simply by soaking it in water then drying it out again.
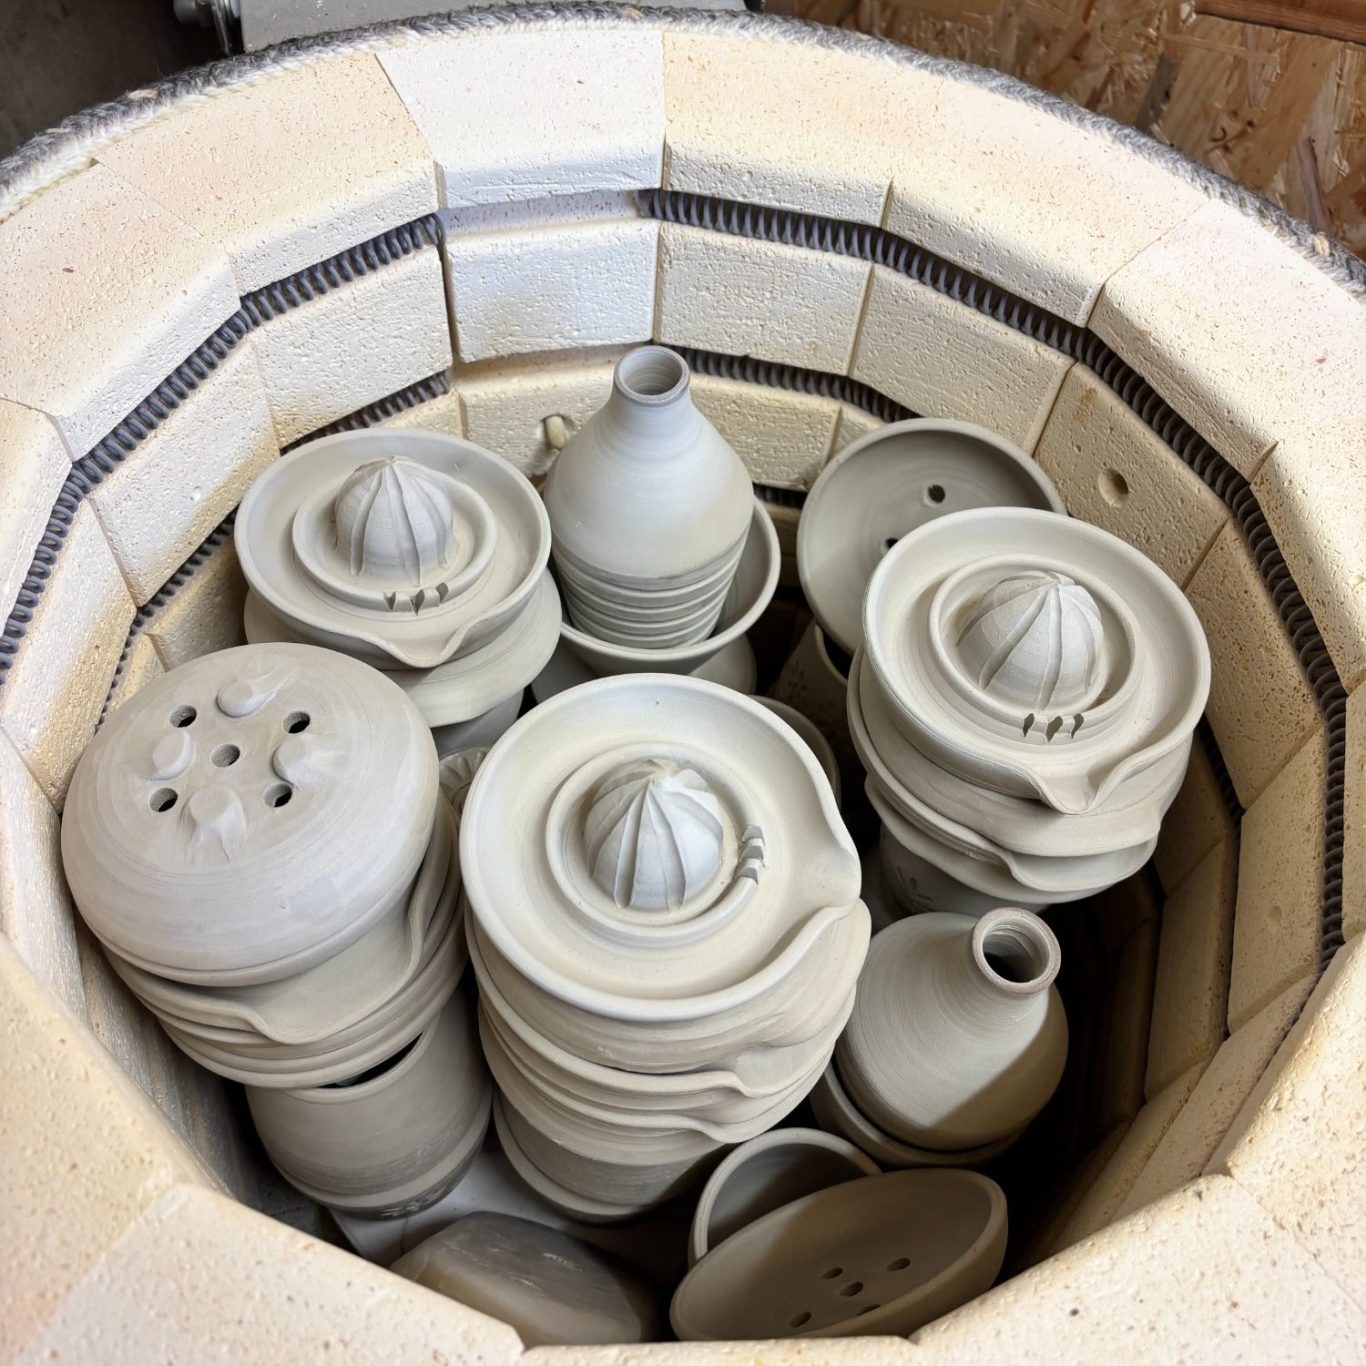
Next, the piece goes through its first firing, called bisque firing. The purpose of this is to heat it to the point that the clay particles are bonded together, so will no longer break down in water, but remains porous, or able to absorb water. This requires the kiln to get up to approximately 1000 degrees celsius gradually over the course of about 12 hours, and cool slowly again over about 12 hours or more. In this firing, the pieces can be packed in tight and touch each other, as they wont stick together.
Glazing
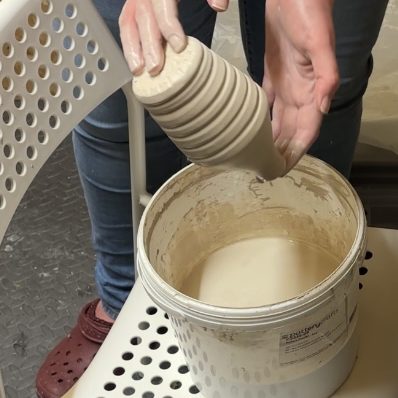
The final stage of creating a finished peice of pottery is to glaze it, which is essentially a thin layer of glass over the surface that can have different colours or textures. Glaze is water with finely ground materials suspended in it. Once applied to the bisque fired piece, the water is absorbed and evaporated and the materials are left behind. They are heated up during the final firing to the top temperature, which in my case is around 1200 degrees celsius, where they melt together.
Glaze melting together is a chemical reaction, the final temperature is not that important, as we care about the overall heat-work, meaning how fast the temperature increased and how long its stayed at that temperature. Therefore, we measure this using cones, which are a combination of materials which melt after a given amount of heat-work, and let us see when certain chemical reactions should have taken place. These go from cone 022 to cone 01, then cone 1 to cone 42. I aim for a cone 5-6 for my glaze firings, as this ensures the clay and glaze is vitrified, meaning water should no longer be absorbed.
There are lots of different ways to glaze and fire pots, such as paint on glaze, dipped glaze, raku firing, saga firing, pit firing, soda firing, salt firing, in oxidation or reduction, in an electric kiln, in a gas kiln or in a wood fired kiln. Most of these I've never tried, but would love to. My set up and pots are usually dipped in glaze and fired in an electric kiln in oxidation up to cone 5-6.
Finishing touches
The glazed pots are removed from the kiln after the final firing, which often takes a full 24-48 hours to heat up and cool down. Sometimes, there can be some roughness to the base, either from the texture of the clay or little pieces of clay that stuck to the bases during the drying process. So, I sand the bottoms lightly with a wet sanding sponge to ensure the roughness isn't at risk of scratching table tops.
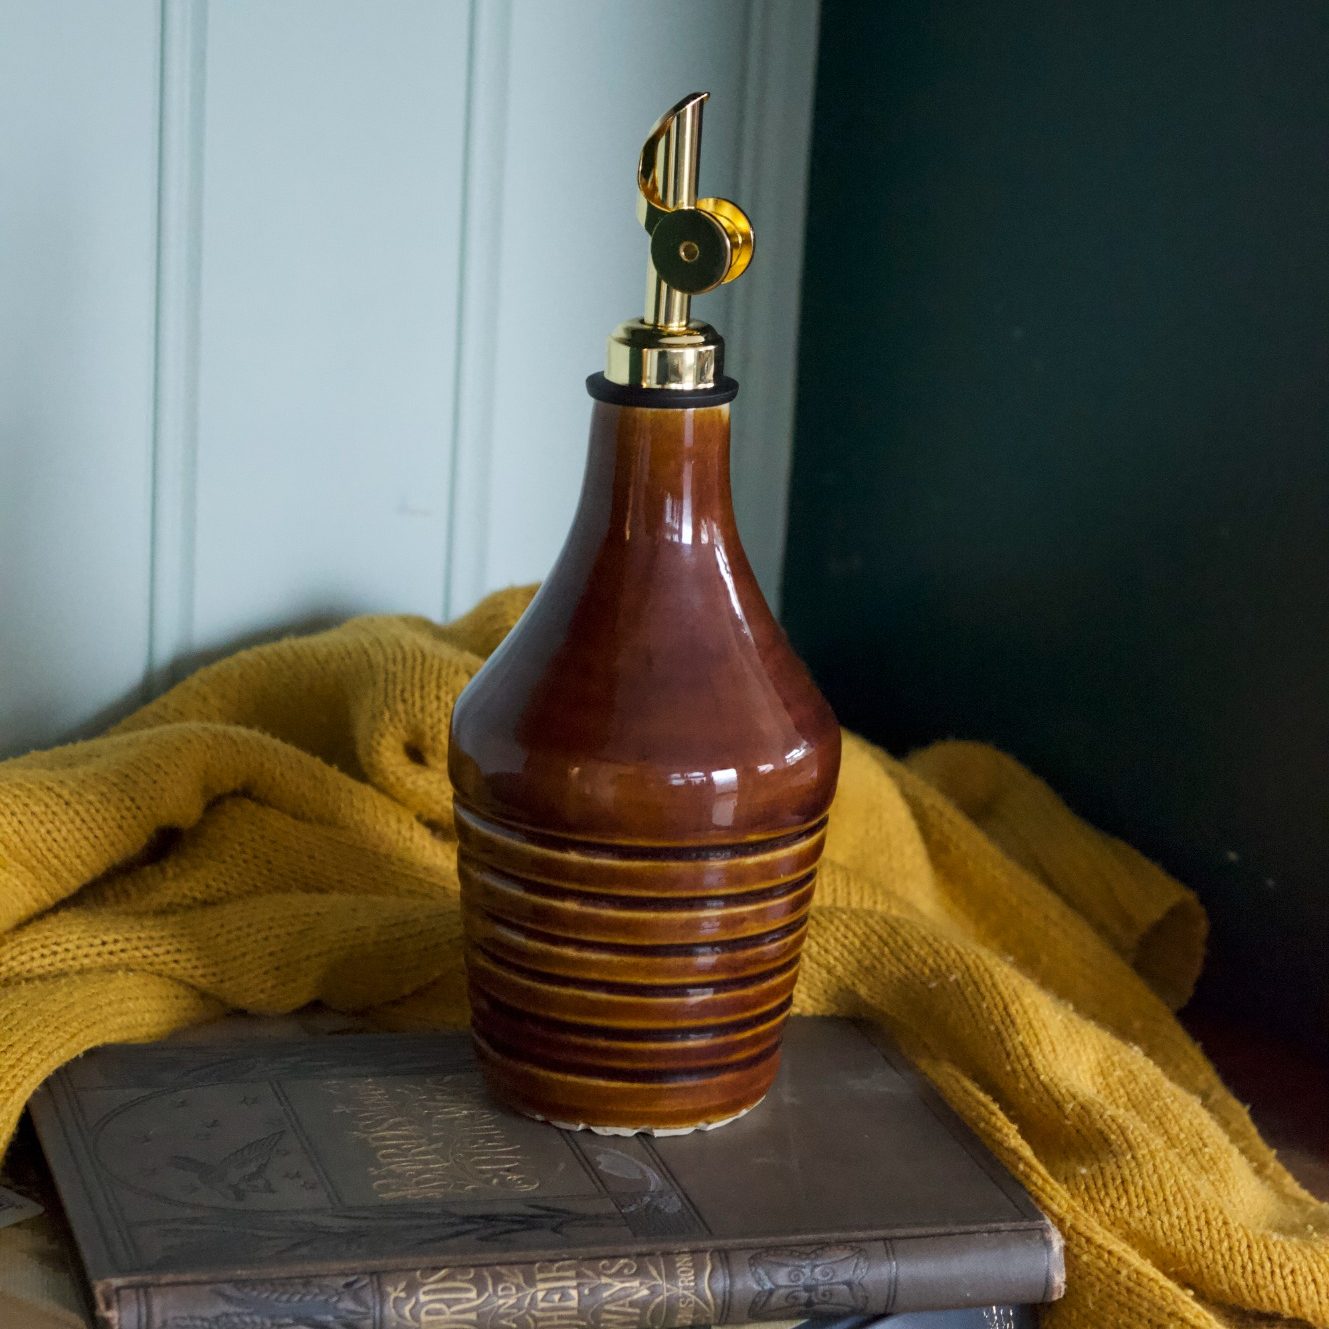
Dispensers and lids are added. This is often a nerve-wracking moment, as the clay shrinks approximately 12% from start to finish, which means I have to calculate the right size to throw to, and ensure I measure precicely to get the fit right.
For me, thats the end of the making process, though some potters add decals images and lustres at this point which require a third firing.
If you've enjoyed reading about my production process, consider following me on instagram, where I post process videos showing you the stages explained above.